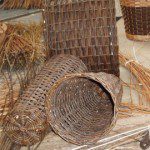
Making Baskets
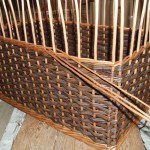
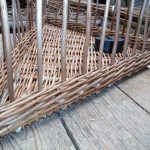
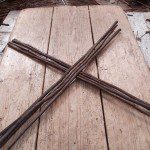
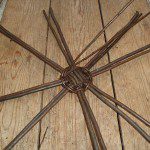
Below are series of photographs taken during the process of weaving some of the more unusual baskets we have the pleasure to make. Whether round or rectangular we always start with the base. Long uprights are then pushed into the base and bent upwards and the position fixed with a wale. This provides the framework for weaving. After this the sides are woven and finally the remaining lengths from the uprights are folded down and woven to form the border.
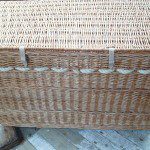
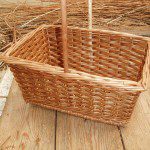
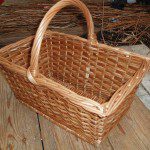
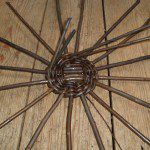
White & Steamed Willow Storage Baskets
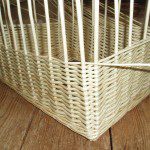
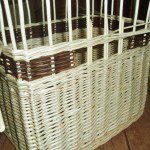
These baskets are primarily made using white willow, but with a band of steamed willow running around the fingerhole section. They have a track border and the weave is randing. Click on the first photo for more information about each stage.
-
- the uprights are held in position by a row of weave known as the wale
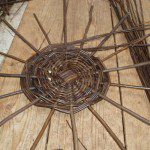
-
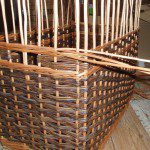
- a single rod of willow at a time is used to form this randed weave basket
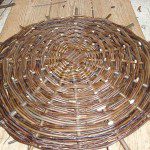
-
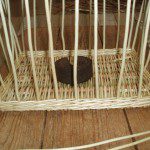
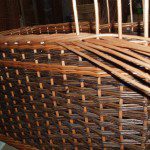
- steamed willow is used around the fingerholes with a white willow wale above
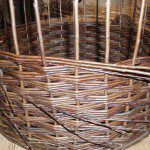
-
- the uprights are being folded down and woven in to form the border
-
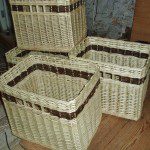
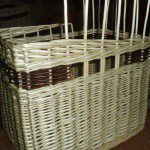
- the finished baskets
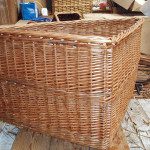
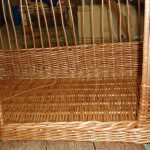
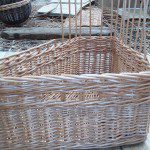
Bespoke Log Basket with Divider
The following pictures show the making of a bespoke log basket with a divider. Handy for both kinding and logs. We used slewed weave and finish with a standard border. click on the first photograph for more information about each stage.
-
- Weaving a buff wale to hold the weave below in place.
-
- The finger holes being woven and fixed again with another wale in buff willow.
-
- Bordering down the basket.
-
- The finished basket.
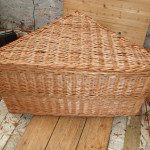
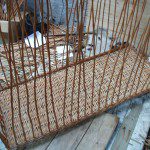
Corner Hamper in Buff Willow
As long as the angle in the corner is 90 degrees it’s fairly easy to make a corner basket. Here made from buff willow using randed weave. Click on the first photograph for more information about each stage.
-
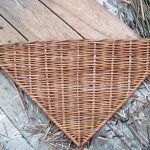
- Starting with a triangular base…
-
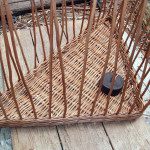
- Stake-up the base and fix the position of the uprights with a wale.
-
- Start weaving. We’re using randed weave
-
- The basket is complete, next is the lid.
-
- The finished basket with lid.
-

- The finished basket.
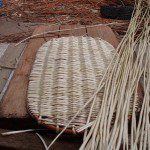
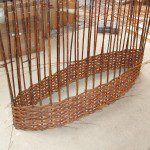
White Willow Moses Basket
A beautiful white willow Moses basket in the making. To make the oval base we form a hoop, fix ‘uprights’ to one end and then weave across. After that the process is the same as on the rectangular basket – the uprights are inserted, the sides woven and the remaining uprights used to form the border. In this case we weave a plait border which is more decorative. Click on the first picture for more information about each stage.
-
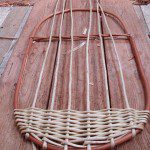
- The base starts with a hoop.
-
- The completed base is ready to stake up.
-
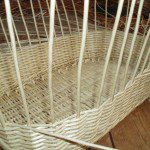
- Randed weave is being used to form the sides.
-
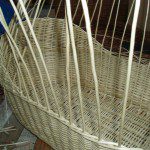
- The weave is finished – next the basket will be ‘bordered down’.
-
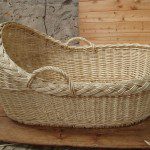
- The finished Moses Basket in white willow with plait border and carry handles.
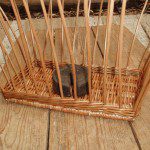
Stage Props – a Hamper with ‘Escape Hatch’
We were asked to make two hampers for Virginia Opera’s production of Falstaff in the USA. The baskets had to have ‘escape hatches’ in the rear. This is how the baskets were built. Click on the first picture for more information about each stage.
-
- The base is finished, just the ends still to be cut .
-
- Partially woven leaving a gap at the back.
-
- The rope is woven in to create rope handles.
-
- The finished hamper viewed from the front.
-
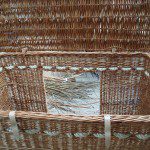
- With the lid open the hole in the back panel can be seen.
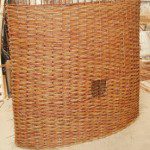
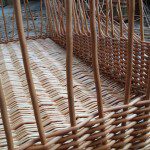
Shaped Corner Baskets
A set of three corner baskets with an unusual shape to the back, made using buff willow. We use randed weave and form a track border, with fingerholes to the fronts. Click on the first picture for more information about each stage.
-
- Base for shaped corner basket.
-
- The uprights are fixed into the base using a wale.
-
- On tall basket a wale is woven about half way up.
-
- At full height a final wale is woven before bordering down.
-
- Bordering down the uprights.
-
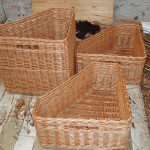
- The complete set.
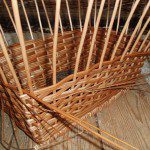
Replica Dorothy (Wizard of Oz) basket
We’ve been asked a couple of times to make replica baskets of the one Dorothy used in the film ‘The Wizard of Oz’. These have gone to Madam Tussauds in Hollywood USA. If you ever visit them be sure to look out for the basket complete with Toto I believe! Click on the first picture for more information about each stage.
-
- The base and uprights in place, secured by the wale.
-
- Weave almost finished (slewed weave).
-
- Handle bow inserted. Needs to be tied into the basket now.
-
- The finished replica ‘Dorothy’ basket.
Steamed Willow Drum Lampshade
The order was for 8 large drum shaped lampshades plus 6 smaller ones for a restaurant. Here we show the making of one of the drums. Click on each picture to see more information about each stage.
-
- We start with 8 rods: 2 sets of 4 to make the base.
-
- The rods have been separated to make 8 sections.
-
- The rods have all been spaced out now so there are 16 sections.
-
- The weave keeps going out from the centre.
-
- The top of the shade ready for weaving the sides.
-
- Slewed weave is used to give the lamp shade texture and let light through.
-
- The finished lampshade – at the back of picture.
The Globe Theatre London
For the production of ‘A Midsummer Night’s Dream at the Globe Theatre in London. It’s a sort of ‘wall’ for a man to stand inside, during a comedy sketch. Click on the first picture to see more information about each stage.
-
- Starting the wall. We had to drill a series of holes in the wooden floor for the uprights to slot into.
-
- A few hours later, the finished article. The holes are for hands to come out of.
-
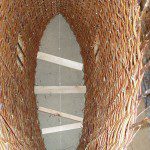
- View from above.
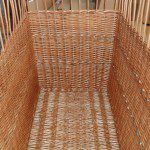
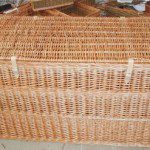
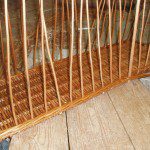
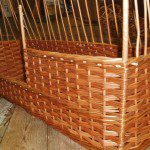
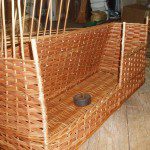
Large Hamper for the Motor Museum Windsor
This is a rather large hamper 55″ x 24″ x 28″ h commissioned by the History on Wheels Motor Museum Nr Windsor (www.historyonwheels.co.uk) to go on an old trade vehicle trailer. Click on the first picture to see more information about each stage.
-
- The base with uprights.
-
- Building up the weave.
-
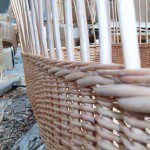
- The thicker band of weave is the wale.
-
- Weave finished, uprights ready for bordering down.
-
- The finished hamper.
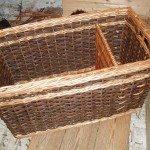
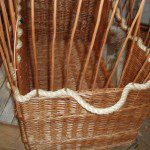
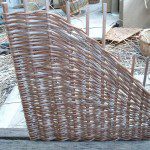
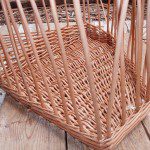
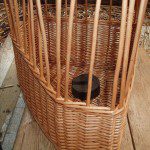
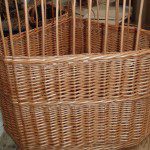
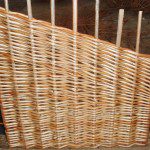
Custom Made Basket for the Boot of a Car
This basket was specially commissioned to fit into the boot of an estate car. The back is angled inwards at 70 degrees to fit snuggly against the rear seat. Two compartments have been created to accommodate dirty wellies on the left and other items on the right. Click on the first picture to see more information about each stage.
-
- As usual we start with the base….
-
- You can see the front wall finishes about half way and the back is tapered inwards.
-
- The edges are being bordered down.
-
- This is to be the divider, woven with a tapering edge to fit.
-
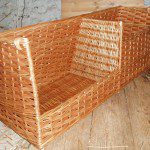
- The finished baskets with two compartments.
Many customers send us photographs of their baskets in-situ. You can see a selection of them on the gallery page. For more information about the different colours available and their properties see the Willow Colours page and to see the various options for borders and weaves please take a look at the Custom Made Options page.